Authenticate Danish Nemid With Devise And Auth0 Ruby On Rails
Ruby on Rails - Authenticate Danish NemID with Devise and Auth0
Introduction
A project that I worked on required the option to let users sign in with their “e-ID”, the Danish NemID login service. NemID is used for signing in to online banking, social customer service and other stuff that require validation of the users identity.
I used alot of time on researching different possibilities, on how to implement NemID in Ruby on Rails - and there isn’t really any easy plug-and-play solution, yet. One solution was to use JRuby along with NemID’s java-applet. Another solution was a custom made Devise integration.
But then I stumpled upon Criipto and their integrations in Auth0.
Criipto (former Grean) is a supplier of a service that lets you use NemID together with Auth0 - and Auth0 is used for SSO(Single Sign On), and can be integrated in many languages. Criipto also has the options for use of Norwegian and Swedish login services.
Auth0 made a very fine starting point here and here on how to get up and running with their and Criipto’s service.
But it wasn’t really enough for our quest, to get it working in a Rails app with Devise aswell. So I will try to outline that in the following steps, with what I did to get everything working.
Prerequisites
Make sure you have a working Rails app, atleast at Rails 4.2.10.
The tutorial have been tested with Rails 4.2.10 and Rails 5.1.4, Ruby 2.4.3 on RVM.
1. Register with Criipto and Auth0
Go to https://auth0.com/authenticate/rails/nemid/ and follow the guide.
Configure Auth0 connection
Log in to your Auth0 account
Click on “Connections” -> “Enterprise”, you should see the same as below:
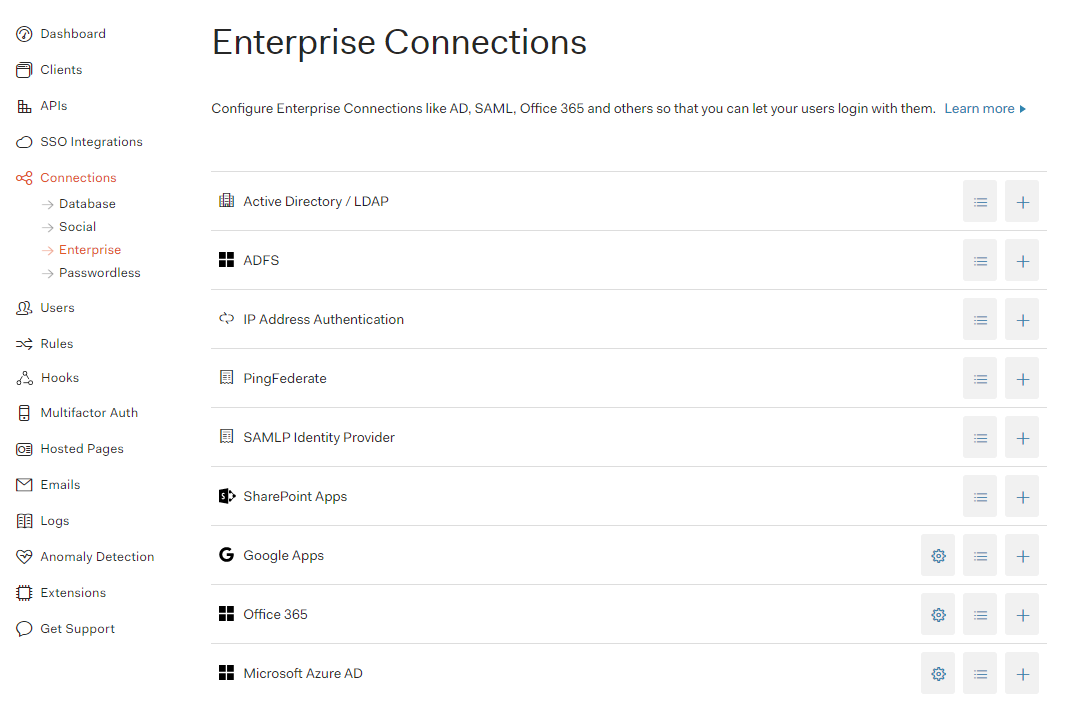
Click on “ADFS” or the icon with the bullet lines

You should now see this popup:
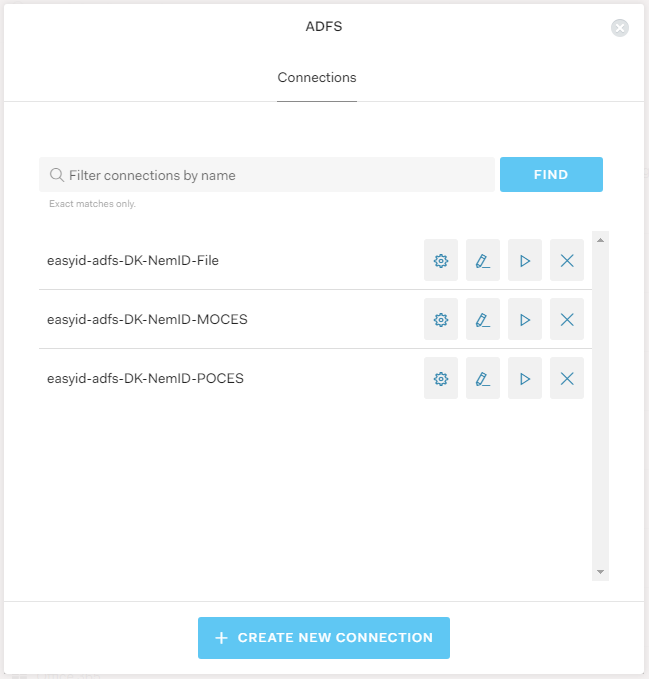
Click on the “cog” icon for “easyid-adfs-DK-NemID-POCES” to access settings for this tenant. (The name might differ from what you have chosen).
In here you can provide the email domains that should be allowed to use for the login services. I just used “@gmail.com” for now.
Hit “Save”, and close the dialog.
Configure Auth0 client
If you have followed the guide that I linked to above, it should also have made a web application as a client in Auth0 for you. We need to configure this, with a callback URL and some other settings.
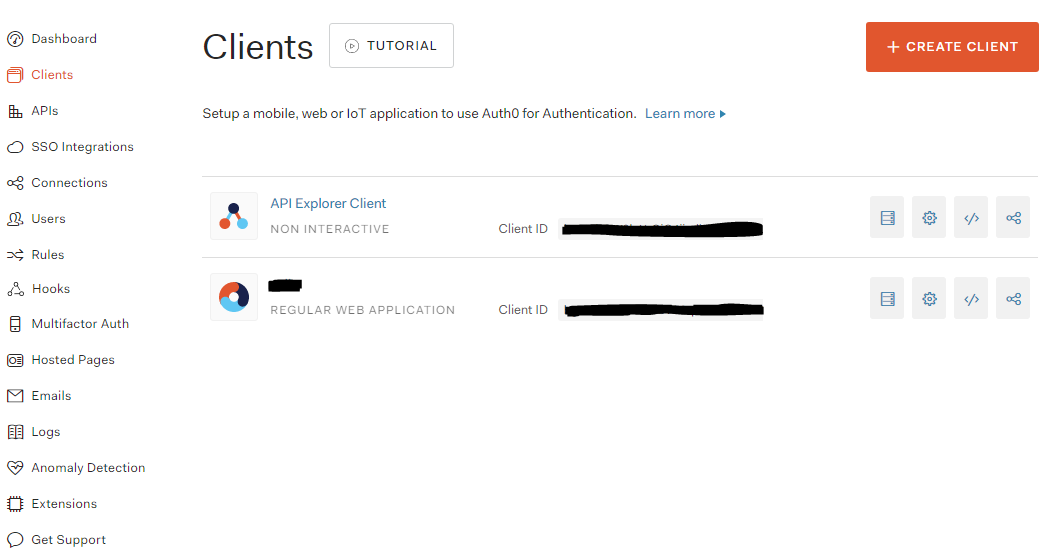
Click on “Clients” in the left sidebar menu.
Find the client that was created, and click the “cog” icon at the right to access the settings.
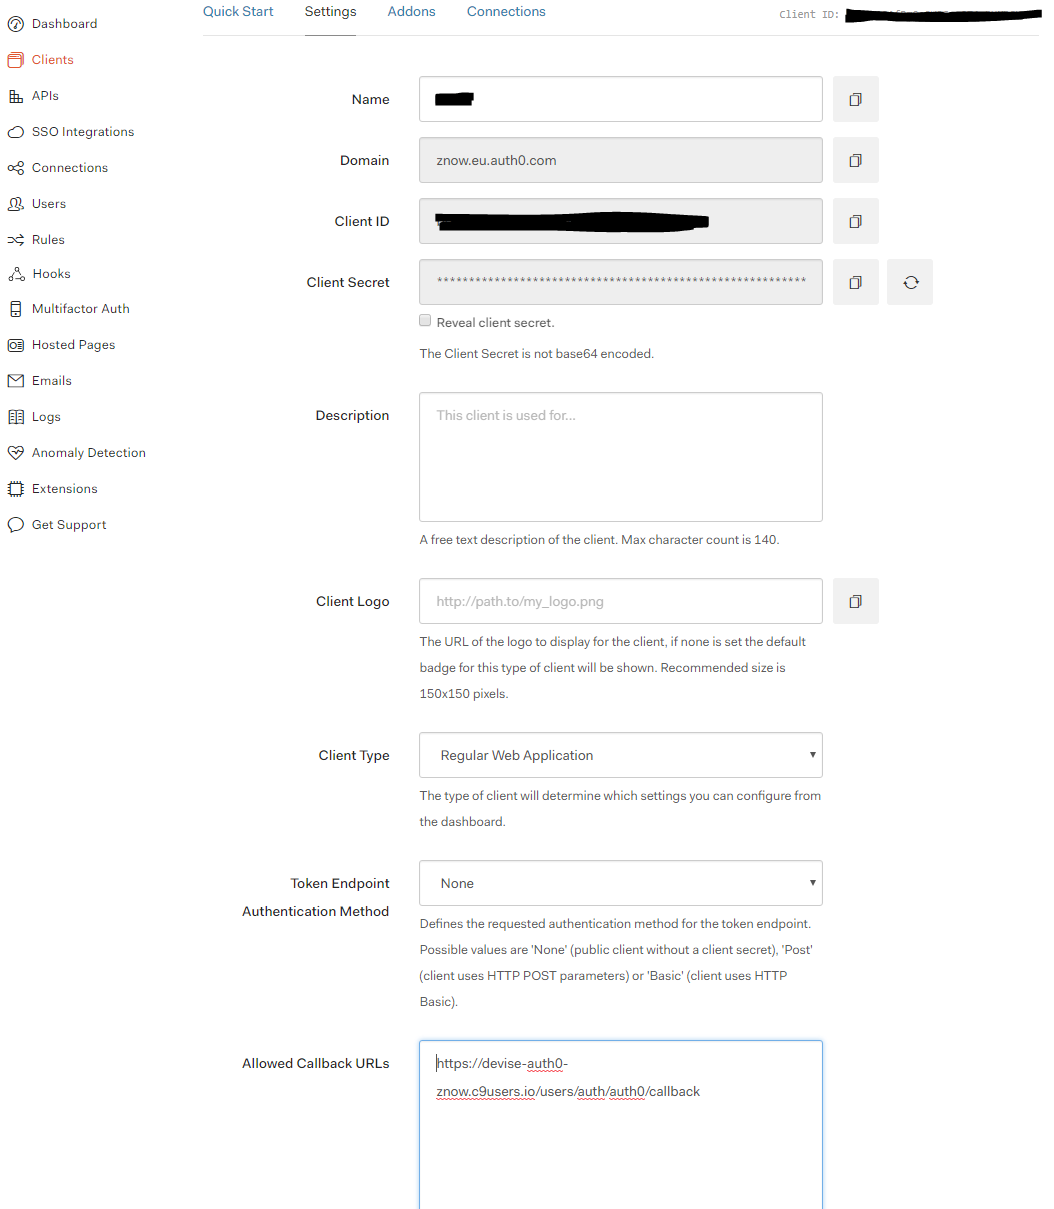
In here we want to notice the “Client ID”, and the “Client Secret”, which we need to store in our environment variables later on.
We also want to add our callback URL, which is the URL of the omniauth_callbacks_controller.rb controller we will be creating very soon.
Further down the page, there is a link for “Advanced Settings”, click that, and find the “OAuth” tab.
We want to disable the “OIDC Conformant” for our scenario, because with this enabled, it will hide the values that would be shown in the results that we need from the NemID authentication service. This includes the CPR among other things.
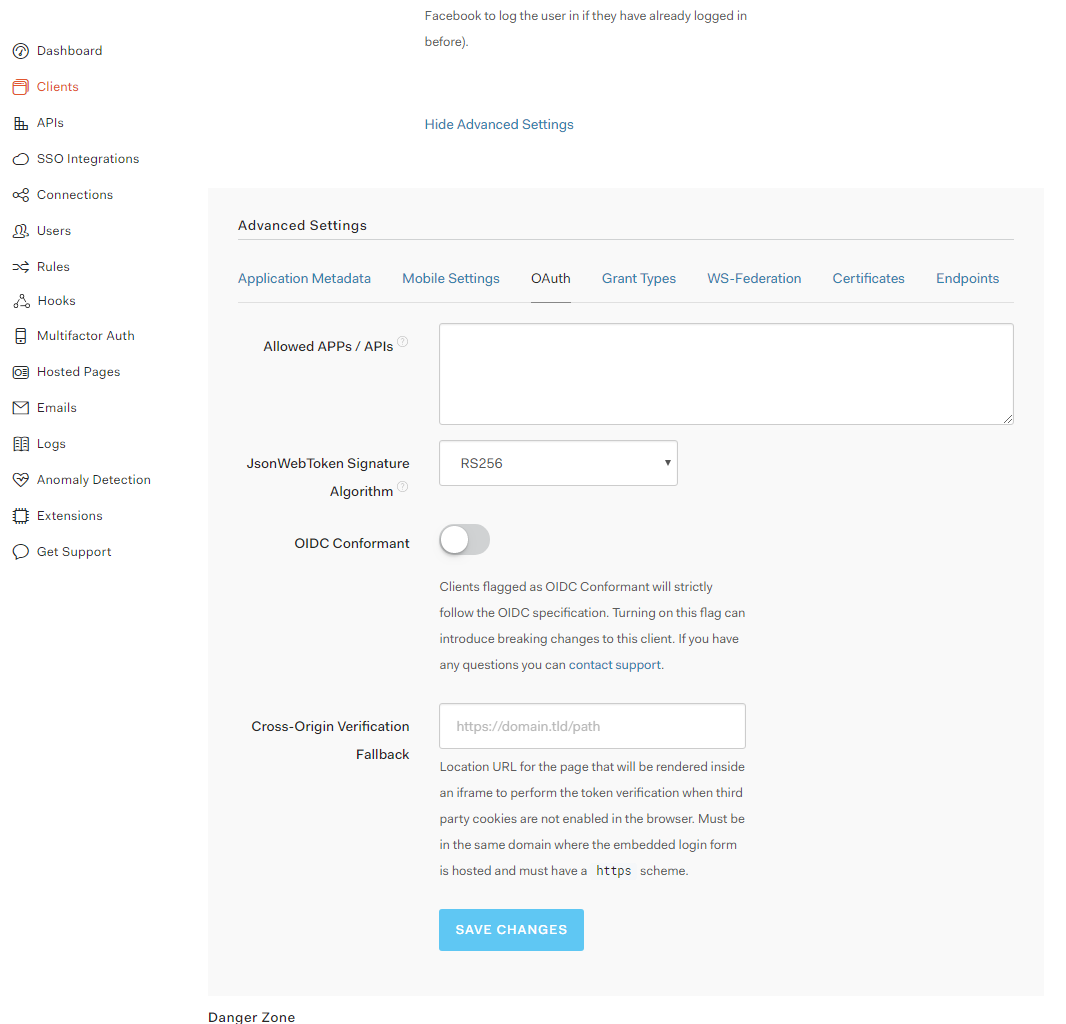
Hit “Save Changes”.
2. Devise
Devise adds authentication support to our application.
Gemfile
Add “devise” to the Gemfile as shown below:
gem 'devise'
Run “bundle install” to install the newly added gem.
Setup
To setup Devise, we need to run the install command, which will add the needed routes for our application and create the Devise initializer that we need to configure later on. We then want to create a Devise “User” model.
Run the following command:
rails g devise:install
Then:
rails g devise User
And lastly, migrate the database:
rake db:migrate
We should now have a working Devise installation with a “User” model for our application.
3. Omniauth & omniauth-auth0
Omniauth enables other providers to be used for authentication, like Facebook, Google etc. Here we will also use the “omniauth-auth0” gem for Auth0 authentication. Omniauth integrates very well with Devise, which we just did setup.
Gemfile
Add “omniauth” & “omniauth-auth0” to the Gemfile as shown below:
gem 'omniauth'
gem 'omniauth-auth0'
Run “bundle install” to install the newly added gems.
Add columns to User model
We want to add 2 columns to our User model, “provider” and “uid” to store information on how the user did authenticate.
Run the following command:
rails g migration AddOmniauthToUsers provider:string uid:string
And:
rake db:migrate
Setup in User model
Locate the “User” model at:
app/models/user.rb
Add the following to the list of devise modules to enable the use of “omniauth” and “omniauth-auth0”:
:omniauthable, omniauth_providers: %i[auth0]
Like so:
  # Include default devise modules. Others available are:
  # :confirmable, :lockable, :timeoutable and :omniauthable
  devise :database_authenticatable, :registerable,
         :recoverable, :rememberable, :trackable, :validatable, :omniauthable, omniauth_providers: %i[auth0]
Add the following two methods which are pretty self explanatory:
  def self.from_omniauth(auth)
    where(provider: auth.provider, uid: auth.uid).first_or_create do |user|
      user.email = auth.info.email || "#{Devise.friendly_token[0,8]}@#{Devise.friendly_token[0,8]}.com"
      user.password = Devise.friendly_token[0,20]
      # If you are using confirmable and the provider(s) you use validate emails,
      # uncomment the line below to skip the confirmation emails.
      # user.skip_confirmation!
    end
  end

  def self.new_with_session(params, session)
    super.tap do |user|
      if data = session["devise.auth0_data"] && session["devise.auth0_data"]["extra"]["raw_info"]
        user.email = data["email"] if user.email.blank?
      end
    end
  end
I added a fallback to the “user.email”, since we don’t always get an emailaddress when signin in with NemID - only when signin in with “employee signature” through NemID we would get an emailaddress. And Devise won’t allow us to create a user without a emailaddress.
Setup in Devise initializer
Locate the Devise initializer at:
config/initializers/devise.rb
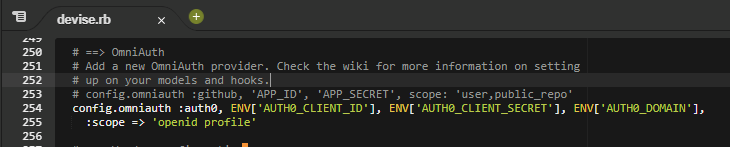
Add the following: (Im using dotenv-rails for environment variables in development)
config.omniauth :auth0, ENV['AUTH0_CLIENT_ID'], ENV['AUTH0_CLIENT_SECRET'], ENV['AUTH0_DOMAIN'],
    :scope => 'openid'
I placed it down where the OmnitAuth configuration is commented out
4. Setup controller & view
I just created a basic “Home” controller with a view, where I put the following:
<%= current_user.inspect %>
<br/>
<%= link_to "Sign in with NemID", user_auth0_omniauth_authorize_path %>
I want to be able to inspect the “current_user” object from Devise, when I have signed in.
5. Create NemID test user
Go to https://appletk.danid.dk/testtools/ and login with user: “oces” and password: “nemid4all”
Click on “Autofill” at the very bottom.
Note down the “CPR”, “alias” and “password”
Click “Submit”.
You should now have a test NemID user.
6. Test!
Fire up your Rails application, and you should see a link “Sign in with NemID”, it will prompt you a email.
Hope this tutorial helps those who had the same hard challenge as me. Please leave a comment below if you have any troubles or changes to this guide, or if I have missed anything important.
The sample app is available here: https://github.com/Znow/devise_auth0
References & Inspiration
- https://criipto.com/ https://www.grean.id/
- https://auth0.com/
- https://github.com/plataformatec/devise/wiki/OmniAuth:-Overview
- https://www.digitalocean.com/community/tutorials/how-to-configure-devise-and-omniauth-for-your-rails-application
- https://github.com/omniauth/omniauth
- https://github.com/auth0/omniauth-auth0
- https://auth0.com/docs/quickstart/webapp/rails
- https://github.com/plataformatec/devise